Friday, February 26, 2016

Delicate ...

 I enjoyed using these stamps so much!! 
Another guest design post from me for Designs By Ryn 
I LOVE playing with these gorgeous stamps !!


This is a background from my stash again; it's Colorwash sprayed onto it.

I stamped the Hibiscus onto a seperate piece of paper, fussy cut it and colored it.
For the background I stamped the Flower Lace stamp, and gave it some highlighting with a white acrylic marker and a brown fineliner, and some color with a watercolor pencil
I also stamped the flower onto the background, to add a layer, and interest of course.

I adhered the flower to the card with some 3D tape.
I added a rub-on script on the right-hand side of the card - you know me, I must add some script!
The green 'frame ' is also a rub-on.
The 'groetjes' (|Inkerbell) text finishes it off.

Thursday, February 25, 2016

Fabulous flowers

I've had a nice play with the Nuance powders from Magenta for the background ... en then it was ready to stamp on it.  
The sentiment is from Inkerbell Stamps. 

Heerlijk kliederen met Nuance poeders van Magenta voor de achtergrond... en dan heerlijk erop stempelen!  
Het sentiment is van Inkerbell Stamps, van de sheet HieperdepiepHoera. 


I am entering this in the challenge on
1. Hero Arts - fabulous flowers. 

Wednesday, February 24, 2016

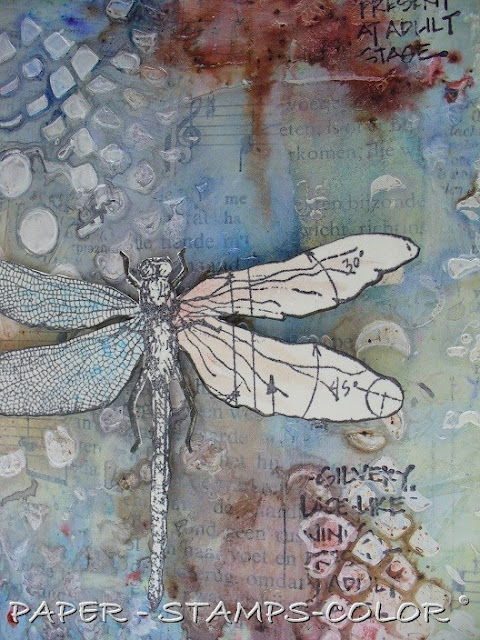
Playing with stencils and mixed media


A tutorial for you today - a big background to be cut up in several pieces - 7 to be precise (5 cards, 2 ATC's )

****
Start on a larger piece of paper (I used a piece slightly bigger than A4), and adhere some book paper randomly onto the page. 
Scribble some color onto it with watercolor crayons.

Paint over it with watered-down gesso to blend the colors. Start with one color, clean the brush and start on another color - otherwise some of it will turn into mud!
At this stage I decided to take most of the color off with a damb cloth, and scraped gesso over the background with an old creditcard. (This is called trial and error, lol).
Now add some white structure paste randomly over several stencils... I chose background ones.


Cut the background into several useful pieces. 

****


Tap some Brusho powder onto the card background, spray with water and leave to dry. Repeat this with a second color (the red is Bistre). 
Add some stamping and a stamped image.  


****


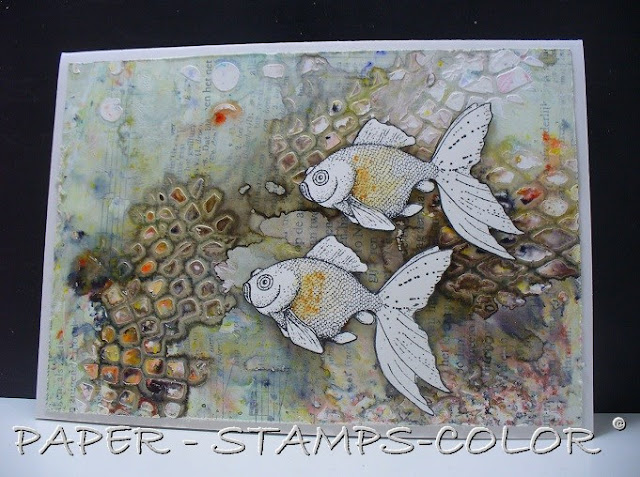
 A second card I've finished, with fish. I did this with the same process as the first card, I used brown Brusho (yes, it's got all these colors in it!). 


You can still see the original background color in places. 


This post as 
The Crafter’s Workshop Design Team Member

****

STENCILS USED: 
Of course The Crafter’s Workshop provided me with some product to create this project, as I am in their design team.
LOVE these stencils!

TCW502 Impressions 12x12


TCW586 Raven Mosaic 12x12

Monday, February 22, 2016

Collaging with stamps and inks..

... is what I like to do most! 

I played with color and stamps and gesso and a stencil here... just starting somewhere (color on a gesso background) and continue until I was satisfied. I love the soft effect of the stencil in the background. 
And - this is not a colorpalette I use often... I like it!  


 Hope you do too?!


PRODUCTS USED:


Thursday, February 18, 2016

LOVE..


Another cardwith some decoupage;  a paper napkin, with a (TCW587 Receipt) stencil, and distress inks.

The (christian) sentiment is from Inkerbell stamps


Wednesday, February 17, 2016

A silhouette....


Stamping with inks from the craft sheet - it blends the colors on this silhouette stamp. I really like using this technique with bold stamps.

****

STAMPS USED:


Tuesday, February 16, 2016

Less Is More


 That is so difficult for me- CAS! 
I like to add layers of color etc, and backgrounds must be my favorite, as I use that a lot. 
But sometimes I like to go back to basics, and create with a little of color and more 'plain'. 

The script is from Magenta


I am entering this in the challenge on 
1. Less is more: One layer and use a stem 

Monday, February 15, 2016

Remembrance ....


I used the embossing resist technique to create the background - see tutorials.
The pictures are from an old diary.  


****

STAMPS USED:

https://www.magentastyle.ca/store/product_info.php?cPath=398_492&products_id=15401&osCsid=h9cdb269m24epmc4setf2j6k71 


Friday, February 12, 2016

Reminder for the TIMI challenge - TEXT ME!

Who does not have a text stamp?  Or old bookpaper?  So it's an easy challenge

PS ! The 'text' part does NOT include sentiments, phrase or single word stamps.... think backgrounds!!

You could also think of using text or script background stamps, or text paper in your projects. Any language, any style, bits torn from magazines, scrapbooking papers.. whatever you can find! ... 

****


Prize: 
Voucher from A Sprinkle Of Imagination
Also... they're offering an extra 10% off for blog readers! 
The code is CSBlog10% and will work from 5-25th of February, with a minimum of £5 spent excluding P&P.


Thursday, February 11, 2016

'De Heer is mijn herder'

Using paper napkins again! 

....with a (TCW587 Receipt) stencil, and distress inks.

The (christian) sentiment is from Inkerbell stamps

Wednesday, February 10, 2016

Bubble ... Bubble ...

 I enjoyed using these stamps so much!! 
Another guest design post from me for Designs By Ryn ; who doesn't want to play with those gorgeous stamps??


I started on a background from my stash, a colorwash background. 
I stamped the seahorses on a seperate piece of paper, fussy cut and colored them. 
The Rising Bubbles and the Spiral Shells were stamped and highlighted with a white acrylic marker. 


I am entering this in the challenge on 
1 Stamps and stencils - Splatter, Spritz, Smoosh

Art Journal page... or play page.. same thing


 For the Dutch Art Journal FB group - theme : 'white space'. 
I decided to just play .. 


Tuesday, February 9, 2016

Playing on an ATC


Stencils make for great backgrounds. 
The stamped images were heat embossed with clear before sponging with distress inks. 

****

Magenta PRODUCTS USED: 

https://www.magentastyle.ca/store/product_info.php?cPath=398_492&products_id=15401&osCsid=h9cdb269m24epmc4setf2j6k71 


23.276.K

Monday, February 8, 2016

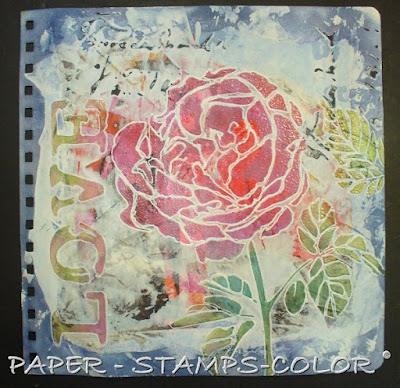
Tutorial : background from magazine paper..

A tutorial for you today, a messy process.. 


Of course The Crafter’s Workshop provided me with some product to create this project, as I am in their design team. 
LOVE these stencils!

****

Adhere a colourful background to your page as shown (I tore the edges).  I knew I was going to use the roses stencil, so I chose a reddish one. YES, it's an elephant!  

Apply black structure paste over the TCW586 Raven Mosaic stencil; do this twice as shown. Leave to dry, of course. 

Apply gesso to the background with a pallet knife, don't try to do this too neat! Leave to dry.

Sponge a dark blue distress ink over the entire page. Clean up the gesso-ed part with a damb cloth. Leave to dry thoroughly before doing the next step. 

Sponge the roses and the word LOVE with various colors of distress inks and heat emboss with clear embossing powder. 

Add highlighting with a white acrylic marker as shown to add depth. 

Add background stamping (drops from Designs By Ryn, script from Katzelkraft). 

When you have a look at the finished page, would you have guessed there is a magazine paper underneath? Without it, there wouldn't have been so much interest in the background. 

 ****

Some sneak peeks:

 I especially LOVE the way the leaves turned out, with the colors from the background shining through. 


I hope you feel inspired?! Go PLAY with your stencils!!


The Crafter’s Workshop Design Team Member

****

STENCILS USED:

TCW586 Raven Mosaic 12x12


TCW514 Cabbage Roses 12x12

TCW585 Inspired Words 12x12