Showing posts with label Color Wash. Show all posts

Wednesday, March 1, 2023

Tuesday, June 9, 2020

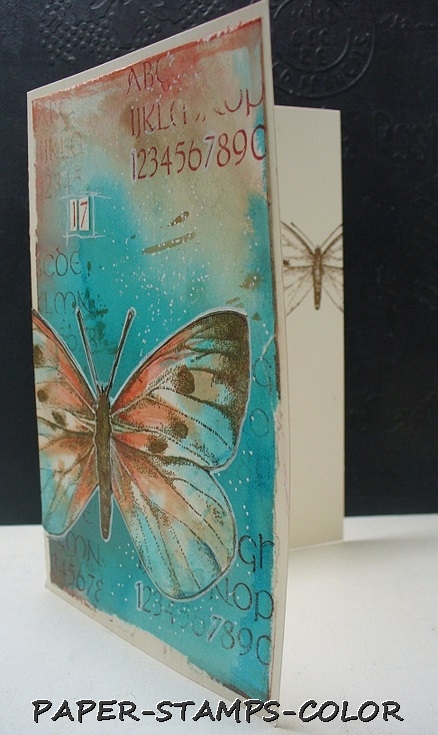
Art Journey al 17 jaar ..

.. en nog steeds mooi om mee te werken! 

De uitdaging deze maand is :
Maak iets feestelijks waar het cijfer 17 op vermeld moet staan


Monday, September 9, 2019

My Creative Monday for Magenta - foliage


LOVE this stamp of the leaf... a golden oldie, I first saw when Miranda used it in a blogpost.

A technique used here that I use a lot.. stamping with a dark ink on a colorful background, heat embossing with clear and decoloring the image with bleach.

On the right hand side on the base of the card : a diecut... it finishes the card off very pretty as far as I am concerned. 


Magenta products used:

Friday, August 16, 2019

_Eclectica³ Kay Carley {with Ellie Knol}

I've made four art journal pages ...
yes...
Kay Carley has some new stamps and stencils with Paper Artsy!

Monday, May 20, 2019

My Creative Monday for Magenta - colorful!


I stamped the image on a colorful background, and then took the color away with bleach. The word "Hello" was stamped with bleach and then drawn with a fineliner. 


Magenta products used:

Thursday, November 9, 2017

Cards for different challenges on Facebook...

...that I haven't shown on my blog. 
To keep my blog up to date with all I create, I post them here too...

.. also because I really like how the've turned out, grin

****

 This was for the Leuke Stempels challenge a while ago.. we had to use these colors. Stamps are from Carabelle Studio. 


****


Challenge from Stampinback, also a few months back. LOVE these stamps!!


****
 AND last but not least: also for the Leuke Stempels challenge a while ago.. we had to use these colors. Stamps are from Carabelle Studio, again! 

Thursday, June 15, 2017

Diecuts can be fun ..


.. but the waste of it too! 


I've used the waste part of the cardstock from cutting with a die for this card. 

Just cut it to size to fit over a colorful background.
You can see (part of) the diecut itself on the right hand side.
Fussycut the flower and assemble it as shown! 


LOVE this effect, and it's a FUN way to create a card! 


****
Magenta products used:


Friday, June 9, 2017

Reminder for the TIMI challenge!

Reminder for the TIMI challenge at the Craft Stamper.... come join!

Take A Stamp: Anything Goes! Remember to include rubber/polymer stamping on your project somehow, somewhere!Take A Stamp: Anything Goes! 


I've made a bookmark with a TCW stencil and Hero Arts script and a sprayink. That's how easy creating can be, lol.

****
Sponsor this time is : JustJolande
Prize: Stamp Set plus Stencil


See you on the Craft Stamper blog! 

Friday, April 14, 2017

White flowers ..


Starting on a dark colored background from your stash can give you such a striking contrast between dark and light. 
HOW TO: 
Do the steps of stamping with a stamping tool. Stamp the flower image and bleach the image itself. Stamp it again and heat emboss with clear. Color the image with watered down white and green acrylic paint. Make a mask of the stamped image and cover the stamped image with it. Stamp a script and heat emboss in white. 


I hope you will give this a try. 

****

Magenta products used:

Saturday, November 5, 2016

Kitty..


Another Katzelkraft creation from me.. with the beautiful cat stamp, again. 
Hope you like it! 


I am entering this in the challenge on 
1. Dutch Card Lovers - autumn colors 

Friday, July 8, 2016

Backgrounds with stencils..

Spray inks and the beautiful 12x12 stencil from Magenta (and some salt crystals) make for beautiful backgrounds!
(the butterfly is not from Magenta)


*****

Magenta products used:
Ants


Friday, February 26, 2016

Delicate ...

 I enjoyed using these stamps so much!! 
Another guest design post from me for Designs By Ryn 
I LOVE playing with these gorgeous stamps !!


This is a background from my stash again; it's Colorwash sprayed onto it.

I stamped the Hibiscus onto a seperate piece of paper, fussy cut it and colored it.
For the background I stamped the Flower Lace stamp, and gave it some highlighting with a white acrylic marker and a brown fineliner, and some color with a watercolor pencil
I also stamped the flower onto the background, to add a layer, and interest of course.

I adhered the flower to the card with some 3D tape.
I added a rub-on script on the right-hand side of the card - you know me, I must add some script!
The green 'frame ' is also a rub-on.
The 'groetjes' (|Inkerbell) text finishes it off.

Wednesday, February 10, 2016

Bubble ... Bubble ...

 I enjoyed using these stamps so much!! 
Another guest design post from me for Designs By Ryn ; who doesn't want to play with those gorgeous stamps??


I started on a background from my stash, a colorwash background. 
I stamped the seahorses on a seperate piece of paper, fussy cut and colored them. 
The Rising Bubbles and the Spiral Shells were stamped and highlighted with a white acrylic marker. 


I am entering this in the challenge on 
1 Stamps and stencils - Splatter, Spritz, Smoosh

Thursday, October 23, 2014

Thursday inspiration for Katzelkraft...

 Two tags with the same stamps and techniques. 

The background has been done with Colorwash and salt. 
I heat embossed the image with black. The color on the tag above was added with a distress marker (barn door), anf on the second tag I added white with a Molotow acrylic marker white. 

I heat embossed the script with white.

****

Some more inspiration from half of the DT on the Katzelkraft blog
On Mondays the other half is happy to inspire you to get out your stamps and have fun. 

****

I am entering this in the challenge on
1.  Smon says stamp - anything goes


STAMPS USED:  
(click on picture)


Saturday, March 8, 2014

Collaged elegance...

 
Today I chose to use 3 stamps to make a collaged card.
I think I have a new favourite Katzelkraft stamp: the stamp in the background.
I started off with a background coloured with Color Wash. For me that is always a good start- you don't have to think about the colors you want to use... just pick a background that suits the stamps, and voila. 


I am entering this in the challenge on 
Simon Says Stamp -  Tick tock - the clock is in the background of the main stamped image.
****

STAMPS USED:  (Click on picture)